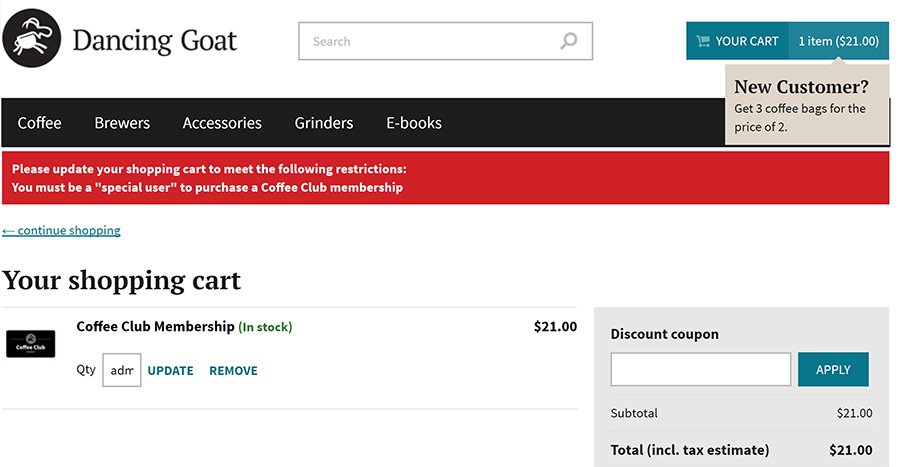

In a world of digital products, a possible requirement can be to have an "eligibility" criteria for purchasing certain products. A typical scenario could be to limit the availability of a membership product to users who have a particular "flag" on their account, are in a specific role, etc.
Let's look at a way of accomplishing this, with a solution that has a degree of flexibility and reusability.
The issues we need to tackle are:
To keep things simple, we will look at implementing this on a simple "shop" type of website, where users select a product from a list. They will be eligible to purchase a particular product if they are in a specific role named "Special user".
Some elements that will assist us in getting this done are:
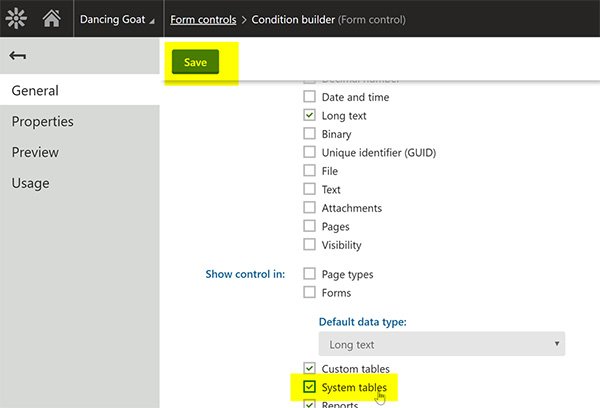
ShoppingCartInfoProvider class. By overriding the right methods, we can check the eligibility criteria of productsBefore we start adding new fields, let's configure the "Condition builder" form control to be usable on system fields. Open the "Form controls" application, edit the "Condition builder" form control, and tick "Show control in: System tables". Click the "Save" button to save the changes.
Let's open the SKU class (Modules > E-commerce > Classes > SKU > Fields), and add new fields.
We will create an "Eligibility" field category, and add the following fields:
| Name | Data type | Form control |
|---|---|---|
| EligibilityCondition | Long text | Condition builder |
| EligibilityValidationMessage | Text (200) | Text box |
Following the instructions on customizing info providers , let's add a CustomShoppingCartInfoProvider class in the App_Code folder (or Old_App_Code, for web application projects).
By overriding the CheckShoppingCartInternal method, we can validate our products by checking the result of the macro method from the EligibilityCondition field.
As there are built-in validation methods that we want to keep, we add our validation results to the ShoppingCartCheckResult object returned from the base method.
[assembly: RegisterCustomProvider(typeof(CustomShoppingCartInfoProvider))]
public class CustomShoppingCartInfoProvider : ShoppingCartInfoProvider
{
    protected override ShoppingCartCheckResult CheckShoppingCartInternal(ShoppingCartInfo cart)
    {
        // The original result of the validation
        var checkResult = base.CheckShoppingCartInternal(cart);

        var resolver = MacroResolver.GetInstance();

        foreach (var item in cart.CartItems)
        {
            var eligibilityCondition = item.SKU.GetStringValue("EligibilityCondition", string.Empty);
            if (string.IsNullOrWhiteSpace(eligibilityCondition))
            {
                // If the 'EligibilityCondition' field is blank,
                // we skip the validation process
                continue;
            }

            var result = resolver.ResolveMacros(eligibilityCondition);
            if (!string.Equals(result, "true", StringComparison.OrdinalIgnoreCase))
            {
                // By resolving the macro expression from the 'EligibilityCondition' field,
                // we expect a "true" value if validation passes. Otherwise, the validation
                // failed, and we need to prevent the user from proceeding with checkout

                // We retrieve the validation message, which will be shown
                // in the shopping cart
                var eligibilityValidationMessage = item.SKU.GetStringValue("EligibilityValidationMessage", string.Empty);

                checkResult.AddCartItemResult(new ShoppingCartItemCheckResult
                {
                    CartItem = item,
                    OtherErrors = { eligibilityValidationMessage }
                });
            }
        }

        // The method returns the object returned from the base method,
        // with the addition of any other failed validation errors
        return checkResult;
    }
}
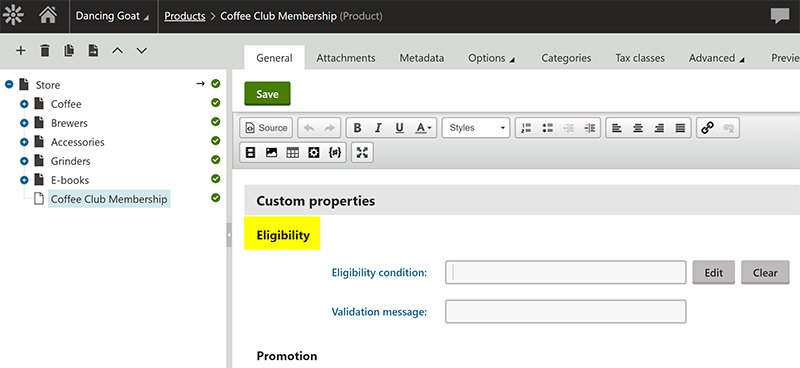
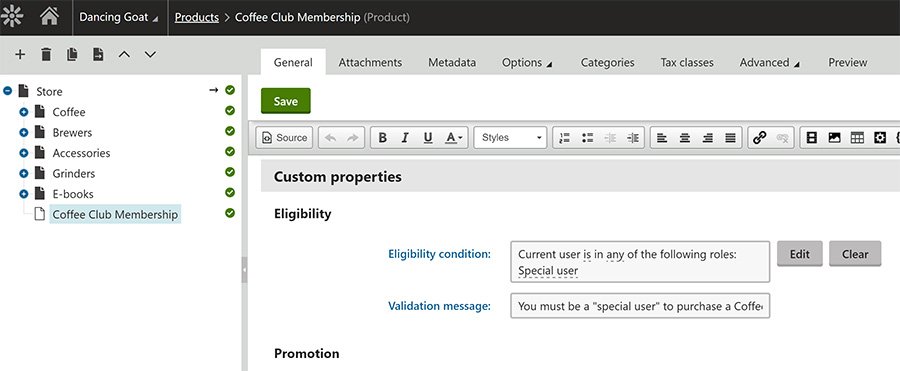
Looking at products in the "Products" application, the new condition fields are displayed under the "Eligibility" header.
The macro condition control gives us an intuitive way of defining the criteria to purchase a product. If the criteria has not been met, the message from the "Validation message" is displayed.
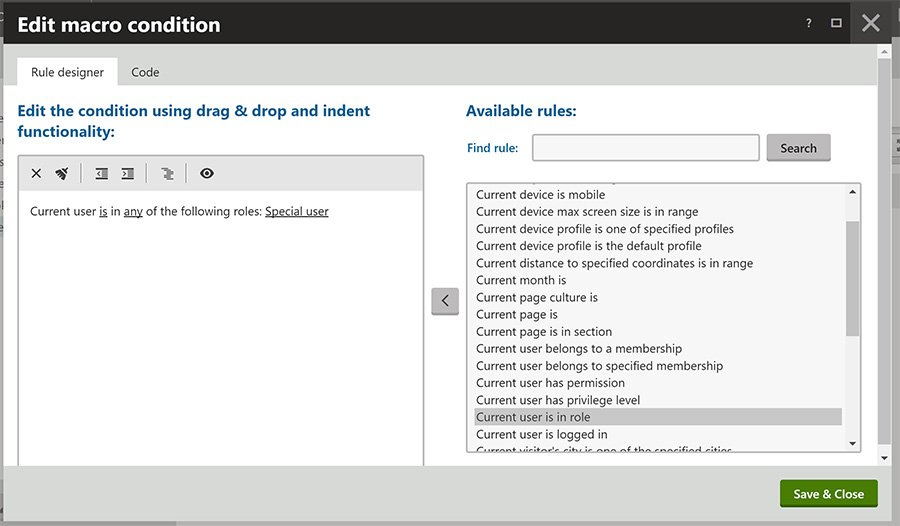
Adding the product to the cart, and visiting the checkout page, we can see the validation in action:
