
As some time has passed since the launch of Kentico Cloud, the idea of an industry-changing cloud-first approach is finally sinking in. The "traditional CMS vs cloud-first CMS" discussion has been settled, and the differences are clear.
However, some important things to consider are:
There has been content out there regarding this, but today we're tackling how to get it done.
We'll work on the "Dancing Goat" Kentico EMS demo site, and replace one of the sections with content loaded from Kentico Cloud. Specifically, we'll replace the content on the Articles section.
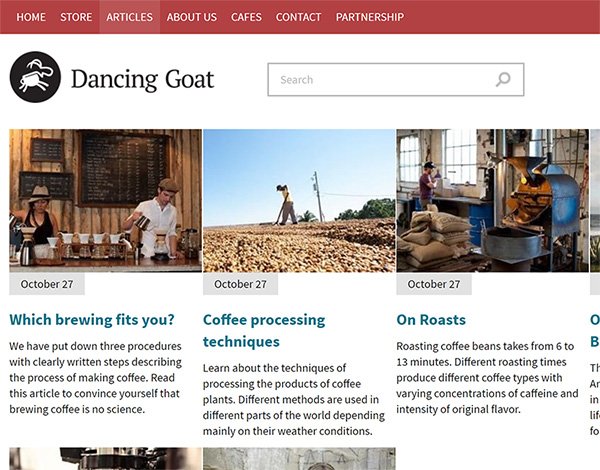
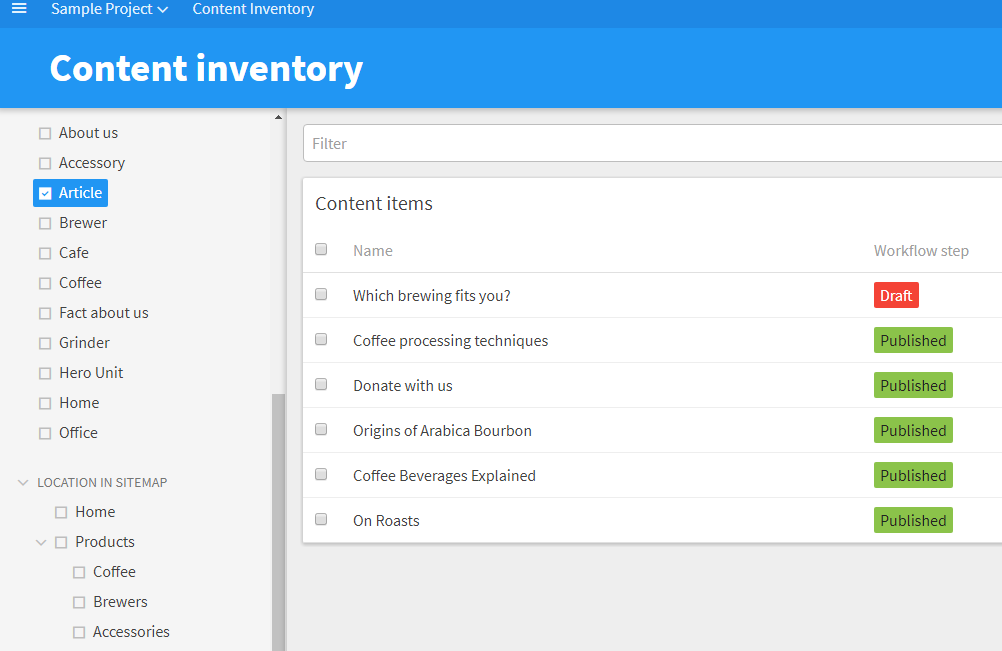
When creating a new Kentico Cloud account, the supplied "Sample Project" contains Dancing Goat sample articles, which we can conveniently re-use.
To retrieve the content from Kentico Cloud, we will use the Kentico Cloud Delivery .NET SDK. The installation is simple using NuGet. Run this in the NuGet Package Manager Console:
Install-Package KenticoCloud.Delivery
With the SDK installed, we can create a custom data source.
Following the instructions from the Kentico documentation, we'll create a data source webpart. We will ensure we retrieve the main fields of our articles, that will later be rendered by a repeater:
We begin by creating a user control.
Following the guidelines for fetching strongly-typed models, we can create an Article class.
The properties of the class should match the codenames of the fields of our article content type in Kentico Cloud.
One exception is the teaser image, where we introduce an additional property to extract the URL from the first asset in the list.
public partial class CMSWebParts_Custom_KenticoCloudDataSourceControl : CMSBaseDataSource
{
  public class Article
  {
    public string Title { get; set; }
    public string Summary { get; set; }
    public DateTime PostDate { get; set; }

    [JsonProperty("teaser_image")]
    public IEnumerable<Asset> TeaserImageAsset { get; set; }
    public string TeaserImage
    {
      get
      {
        return TeaserImageAsset.First().Url;
      }
    }
  }

  . . .

}
This is followed by the code to actually retrieve the content from Kentico Cloud. You should have your project ID ready, as this must be provided to the constructor when creating our instance of DeliveryClient.
public partial class CMSWebParts_Custom_KenticoCloudDataSourceControl : CMSBaseDataSource
{

  . . .

  protected override object GetDataSourceFromDB()
  {
    // Create a new instance of the delivery client.
    // The project ID must be provided
    var client = new DeliveryClient("(your project ID)");

    // Retrieve Article items
    var response = Task.Run(() => {
      return client.GetItemsAsync<Article>(new EqualsFilter("system.type", "article"));
    }).Result;

    DataSource = response.Items;

    return DataSource;
  }
}
The final step for our datasource webpart is to include the user control, and wire it up.
<%@ Control Language="C#" AutoEventWireup="true" CodeFile="KenticoCloudDataSource.ascx.cs" Inherits="CMSWebParts_Custom_KenticoCloudDataSource" %>
<%@ Register Src="~/CMSWebParts/Custom/KenticoCloudDataSourceControl.ascx" TagPrefix="uc1" TagName="KenticoCloudDataSourceControl" %>

<uc1:KenticoCloudDataSourceControl runat="server" ID="srcCloud" />
using CMS.PortalEngine.Web.UI;

public partial class CMSWebParts_Custom_KenticoCloudDataSource : CMSAbstractWebPart
{
    public override void OnContentLoaded()
    {
        base.OnContentLoaded();
        SetupControl();
    }

    protected void SetupControl()
    {
        if(!StopProcessing)
        {
            srcCloud.FilterName = (string)GetValue("WebPartControlID");
        }
    }
}
The datasource webpart can now be added to the page, alongside a basic repeater that will render the content.
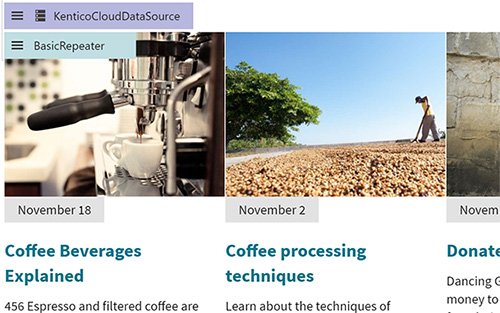
The transformation can use the Eval method with the properties we created in the Article class.
<div class="col-md-3">
  <div class="article-tile">
    <a href="#">
      <img class="article-tile-image" src="<%#Eval("TeaserImage")%>" alt="<%#Eval("Title")%>">
    </a>
    <div class="article-tile-date">
      <%#Eval<DateTime>("PostDate").ToString("MMMM d")%>
    </div>
    <div class="article-tile-content">
      <h2 class="h4"><a href="#"><%#Eval("Title")%></a></h2>
      <p class="article-tile-text"><%#Eval("Summary")%></p>
    </div>
  </div>
</div>
One important aspect of Kentico Cloud is the Webhooks feature. It allows your application to be notified when content is changed in Kentico Cloud. This allows us to clear the cache in our datasource, and load the new data on the next request.
We'll start setting this up by creating a code-only module in Visual Studio. With the code-only module set up, we'll create a web handler, which will be triggered by Kentico Cloud in the form of a webhook notification.
using System.Web;
using CMS.Routing.Web;
using KT.KenticoCloudCache;

[assembly: RegisterHttpHandler("cloud-listener/cache-bust", typeof(CacheBustHandler))]
namespace KT.KenticoCloudCache
{
  public class CacheBustHandler : IHttpHandler
  {
    public bool IsReusable { get { return true; } }

    public void ProcessRequest(HttpContext context)
    {

    }
  }
}
We can now work on the ProcessRequest method, where we need to accomplish the following:
Looking at the verification hash signing example, we'll create a variation of the GenerateHash method that verifies the request.
private bool VerifyRequest(HttpContext context, string secret)
{
  var requestBody = new StreamReader(context.Request.InputStream, context.Request.ContentEncoding).ReadToEnd();

  // The signature we need to verify
  var signature = context.Request.Headers["X-KC-Signature"];

  var safeUtf8 = new UTF8Encoding(encoderShouldEmitUTF8Identifier: false, throwOnInvalidBytes: true);
  var keyBytes = safeUtf8.GetBytes(secret);
  var messageBytes = safeUtf8.GetBytes(requestBody);
  using (var hmacsha256 = new HMACSHA256(keyBytes))
  {
    var hashMessage = hmacsha256.ComputeHash(messageBytes);
    return Convert.ToBase64String(hashMessage) == signature;
  }
}
Our ProcessRequest method can now use the VerifyRequest method to verify the authenticity, and then touch a cache key for clearing the articles cache.
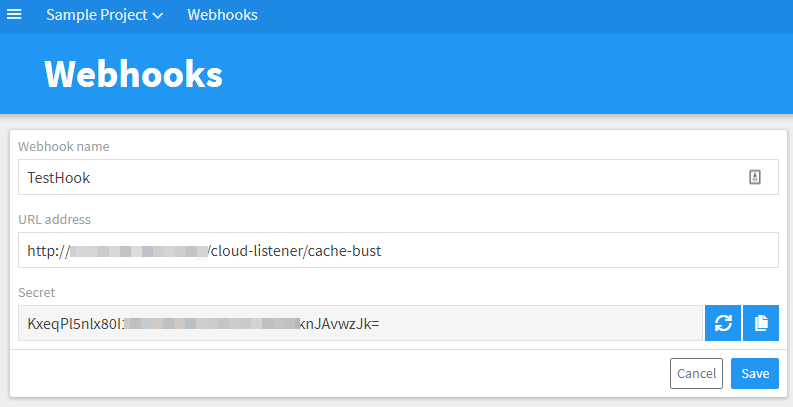
Open the Webhooks section in Kentico Cloud, and create a new webhook.
Set the URL address to our /cloud-listener/cache-bust web handler, and copy the secret key.
With the webhook configured, we can verify requests using the secret key, and clear the cache
public void ProcessRequest(HttpContext context)
{
  var requestValid = VerifyRequest(context, "(secret key)");
  if (!requestValid)
  {
    context.Response.StatusCode = (int)HttpStatusCode.BadRequest;
    context.Response.Write("Invalid signature");
    context.Response.End();
    return;
  }

  CacheHelper.TouchKey("kenticocloud.articles");
}
The kenticocloud.articles cache key needs to be set as a dependency on our datasource webpart. We can do this by adding the key to the list of dependencies (as per the documentation), by overriding the GetDefaultCacheDependencies method.
public partial class CMSWebParts_Custom_KenticoCloudDataSource : CMSAbstractWebPart
{
  public override string GetDefaultCacheDependencies()
  {
    var dependencies = base.GetDefaultCacheDependencies();

    if(dependencies != null)
    {
      dependencies += "\n";
    }

    dependencies += "kenticocloud.articles";

    return dependencies;
  }

  public override void OnContentLoaded()
  {
    base.OnContentLoaded();
    SetupControl();
  }

  protected void SetupControl()
  {
    if(!StopProcessing)
    {
      srcCloud.FilterName = (string)GetValue("WebPartControlID");

      srcCloud.CacheItemName = CacheItemName;
      srcCloud.CacheDependencies = CacheDependencies;
      srcCloud.CacheMinutes = CacheMinutes;
    }
  }
}
With our caching configured, when a change in Kentico Cloud is published, the cache of the datasource is cleared. This ensures optimal performance, while ensuring up-to-date content.
So, you have established your content hub with Kentico Cloud, your content is available in the form of a mobile app, and your Kentico EMS site displays the same content. At this point, you can start planning the next move.
A lot of businesses are concerned with the costs and effort required to give the cloud-first paradigm shift a try. This is why a small-scale rollout might be a better approach, with less risk involved.